Card Swap Bag
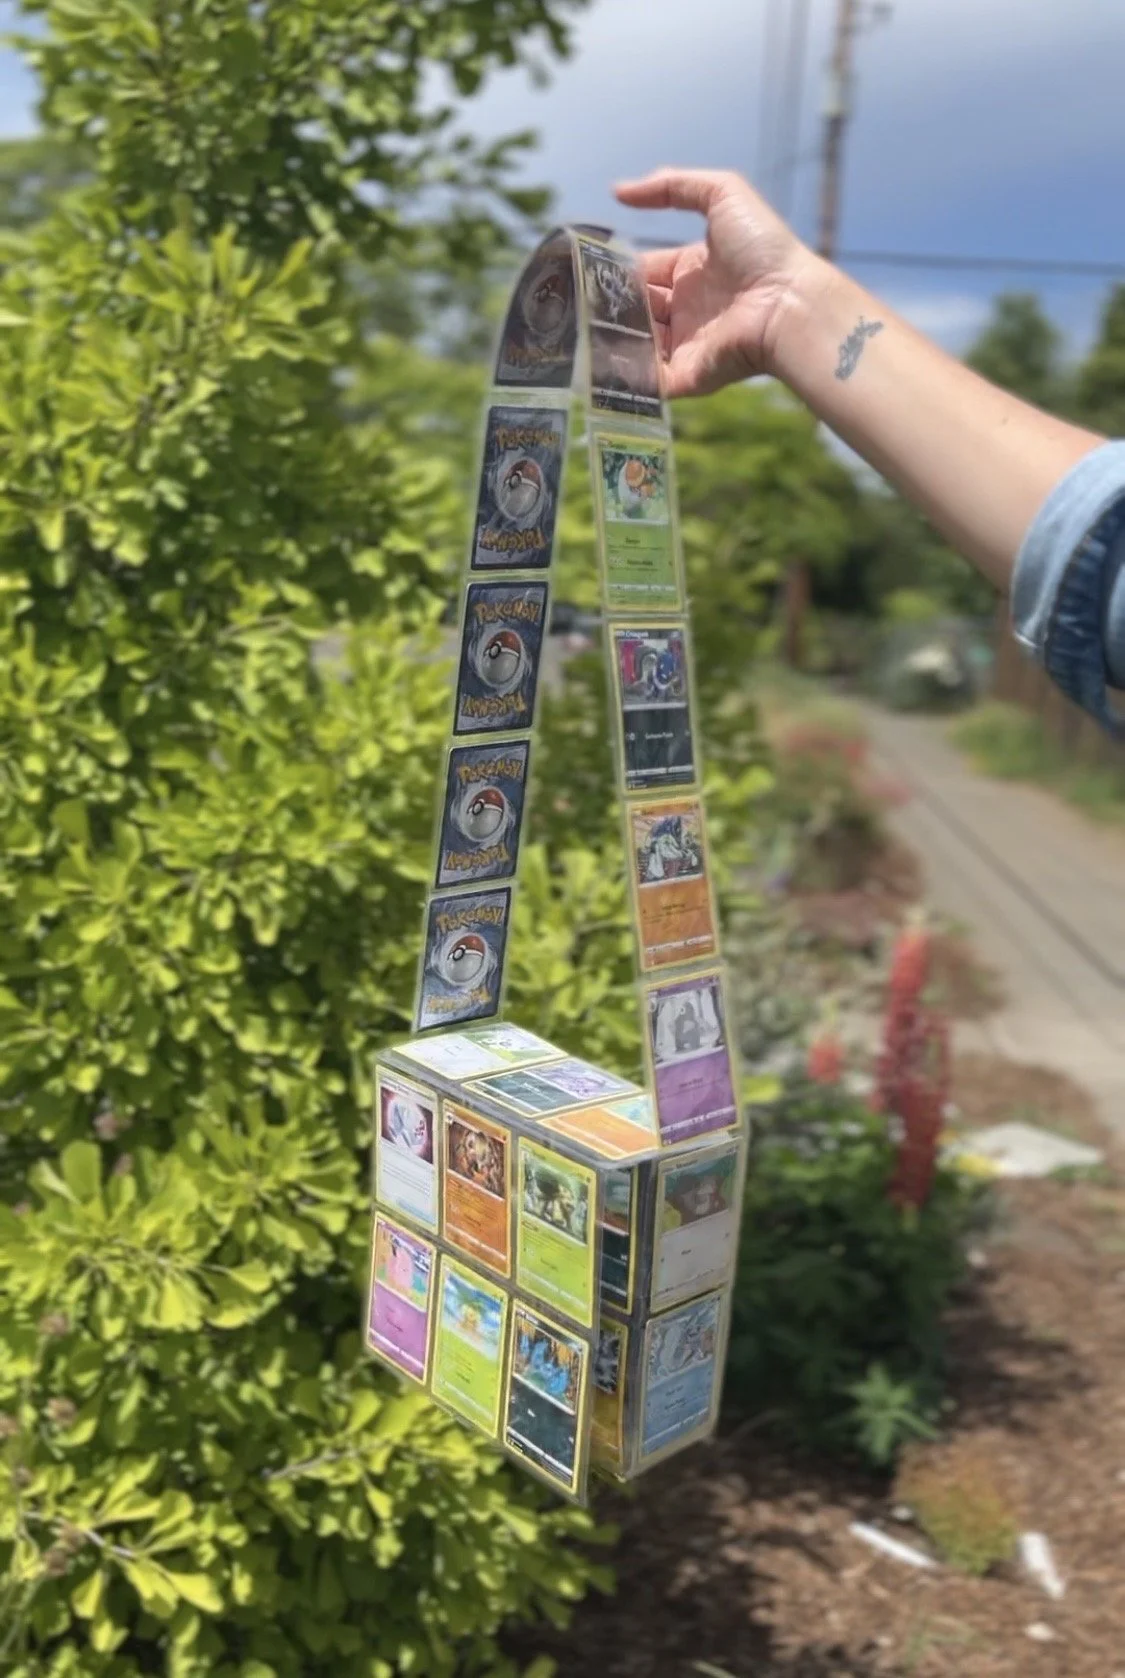
Pokemon cards are all the rage among my kids and their friends right now so I thought it’d be fun to make a bag displaying a Pokemon card collection. It’s perfect for trading with strangers and friends and you could totally use it for other types of cards too! Here’s the video tutorial.

You’ll need…
Six 9-pocket pages
scissors
heavy duty packing tape
INSTRUCTIONS
Cut out the panels making sure to cut a little smidge outside the seam. You’ll ‘waste’ a row of card holders but if you cut right down the center, the glue/seam will open anyways and you’ll lose both rows. I’ve included a picture of how I configured my bag but you could alter yours as needed (longer straps, wider base, etc).
Lay them out with the opening to the card protectors facing down. Since you’re taping the back, you’re not accidentally taping over any opening where cards would go, tape away! I found it easiest to start with taping the sides and bottom to the back panel while it’s all flat, then pulling the side to meet the bottom.
When you’ve taped the back side of all the pocket page panels together, start taping the front. Be sure not to tape over any of the pocket openings (see diagram below for tips). When connecting strap pieces you can put tape over the bottom of one piece and then INSIDE the pocket opening of the next (see crude diagram below).
Fill with cards and start trading!
If you make a bag using this tutorial, please tag me on social media (@pdxdinorama). I’d love to see!
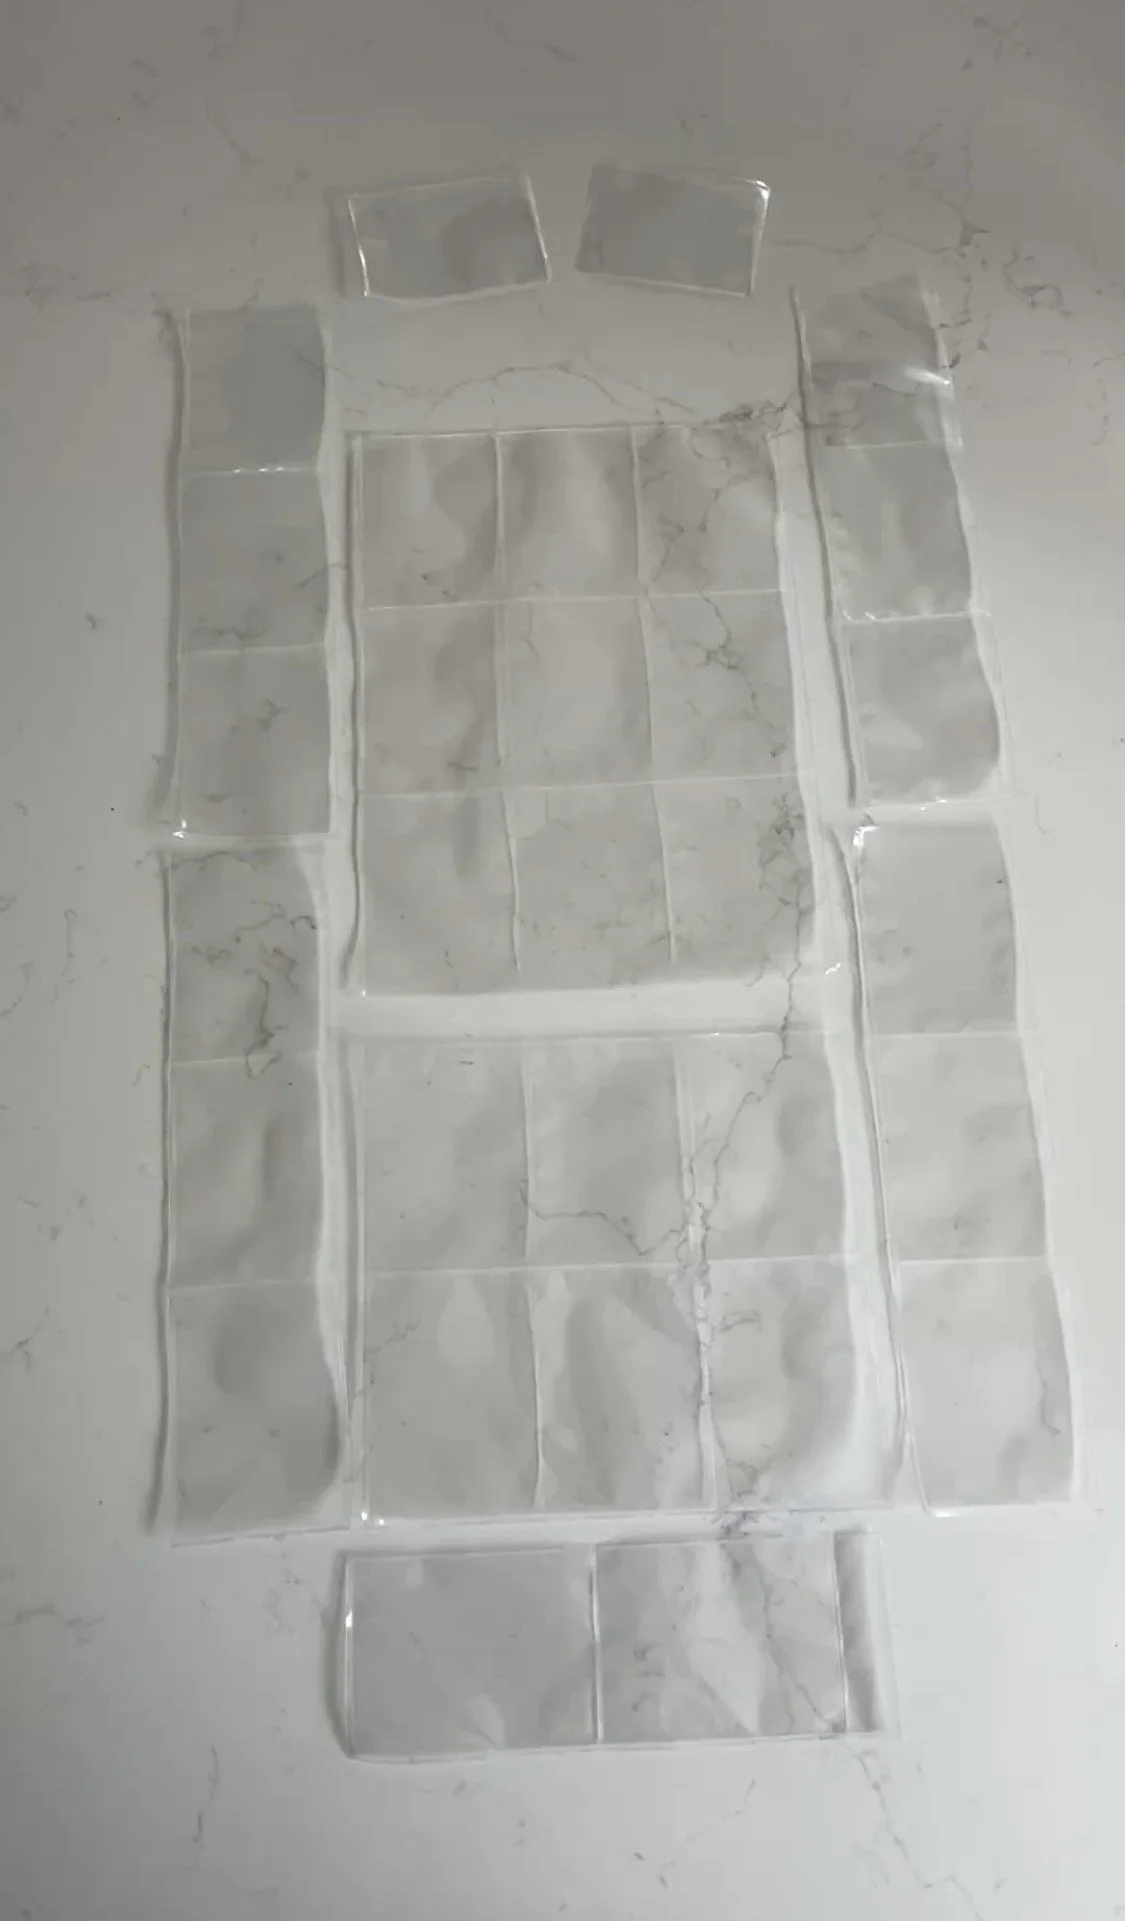
This is the configurations minus the front panel (which is a 2×3 section just like the back)
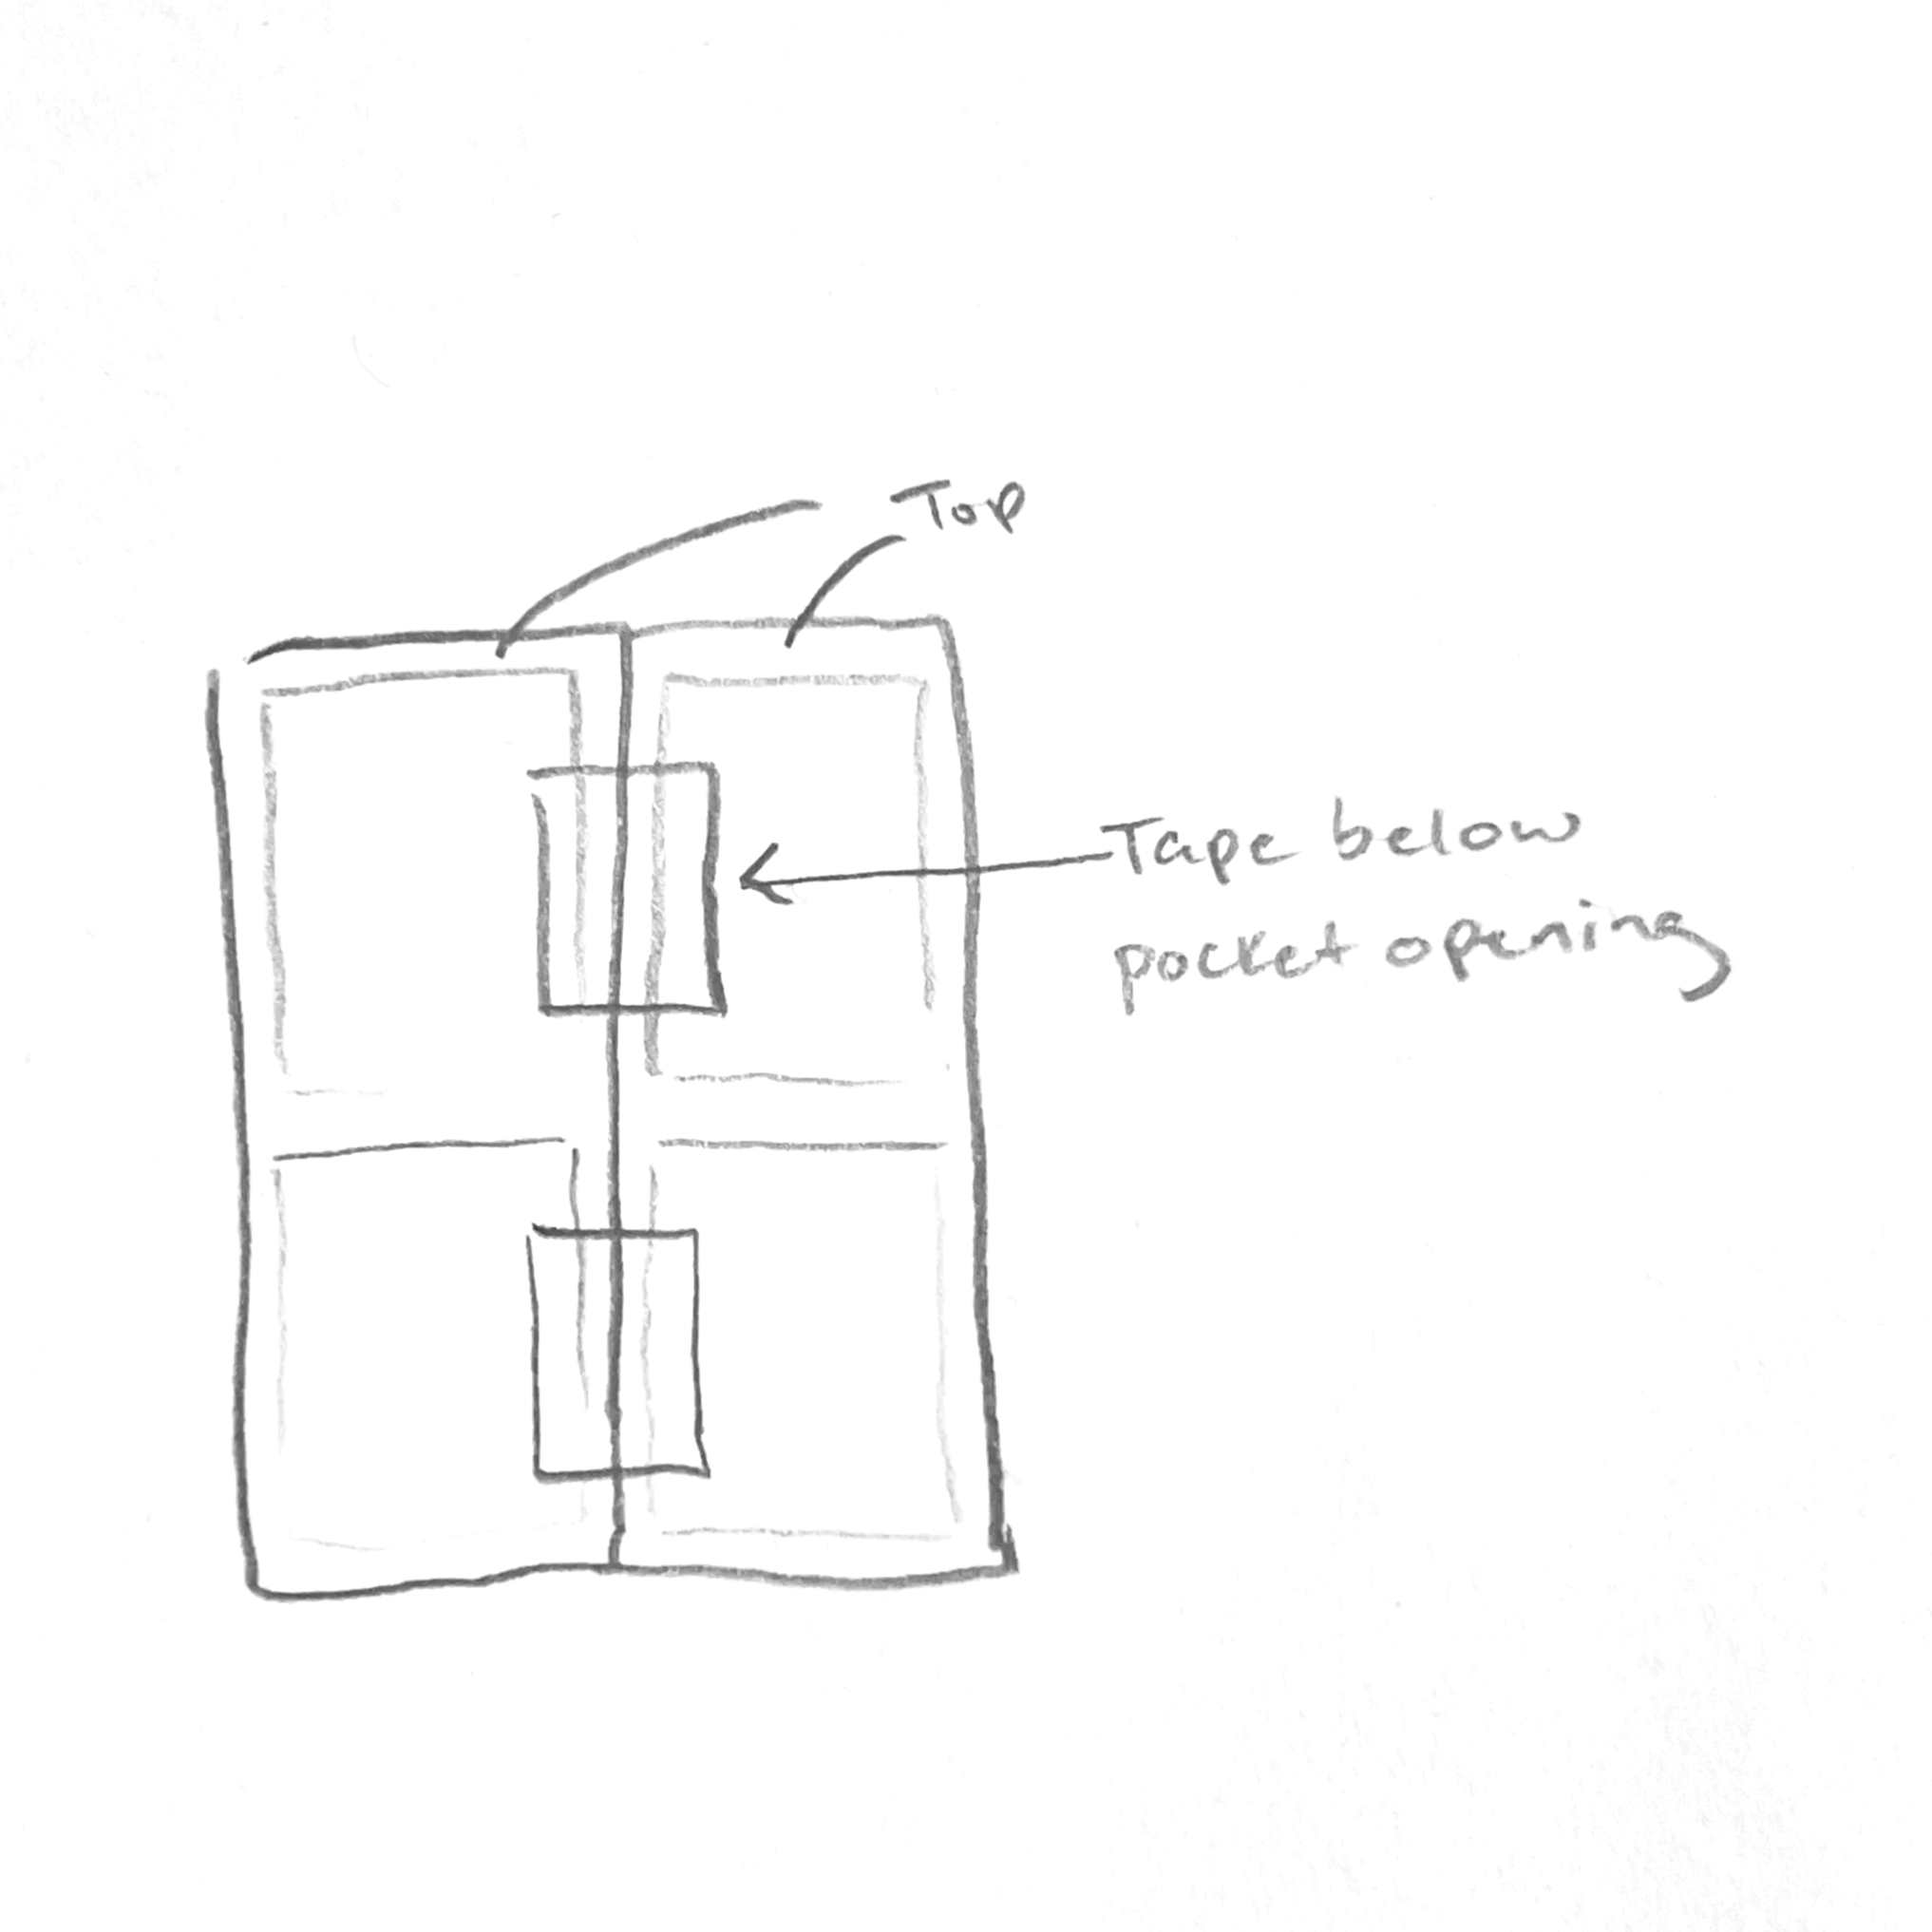
When taping sides of rows together in the front, place tape pieces below each row’s pocket opening.
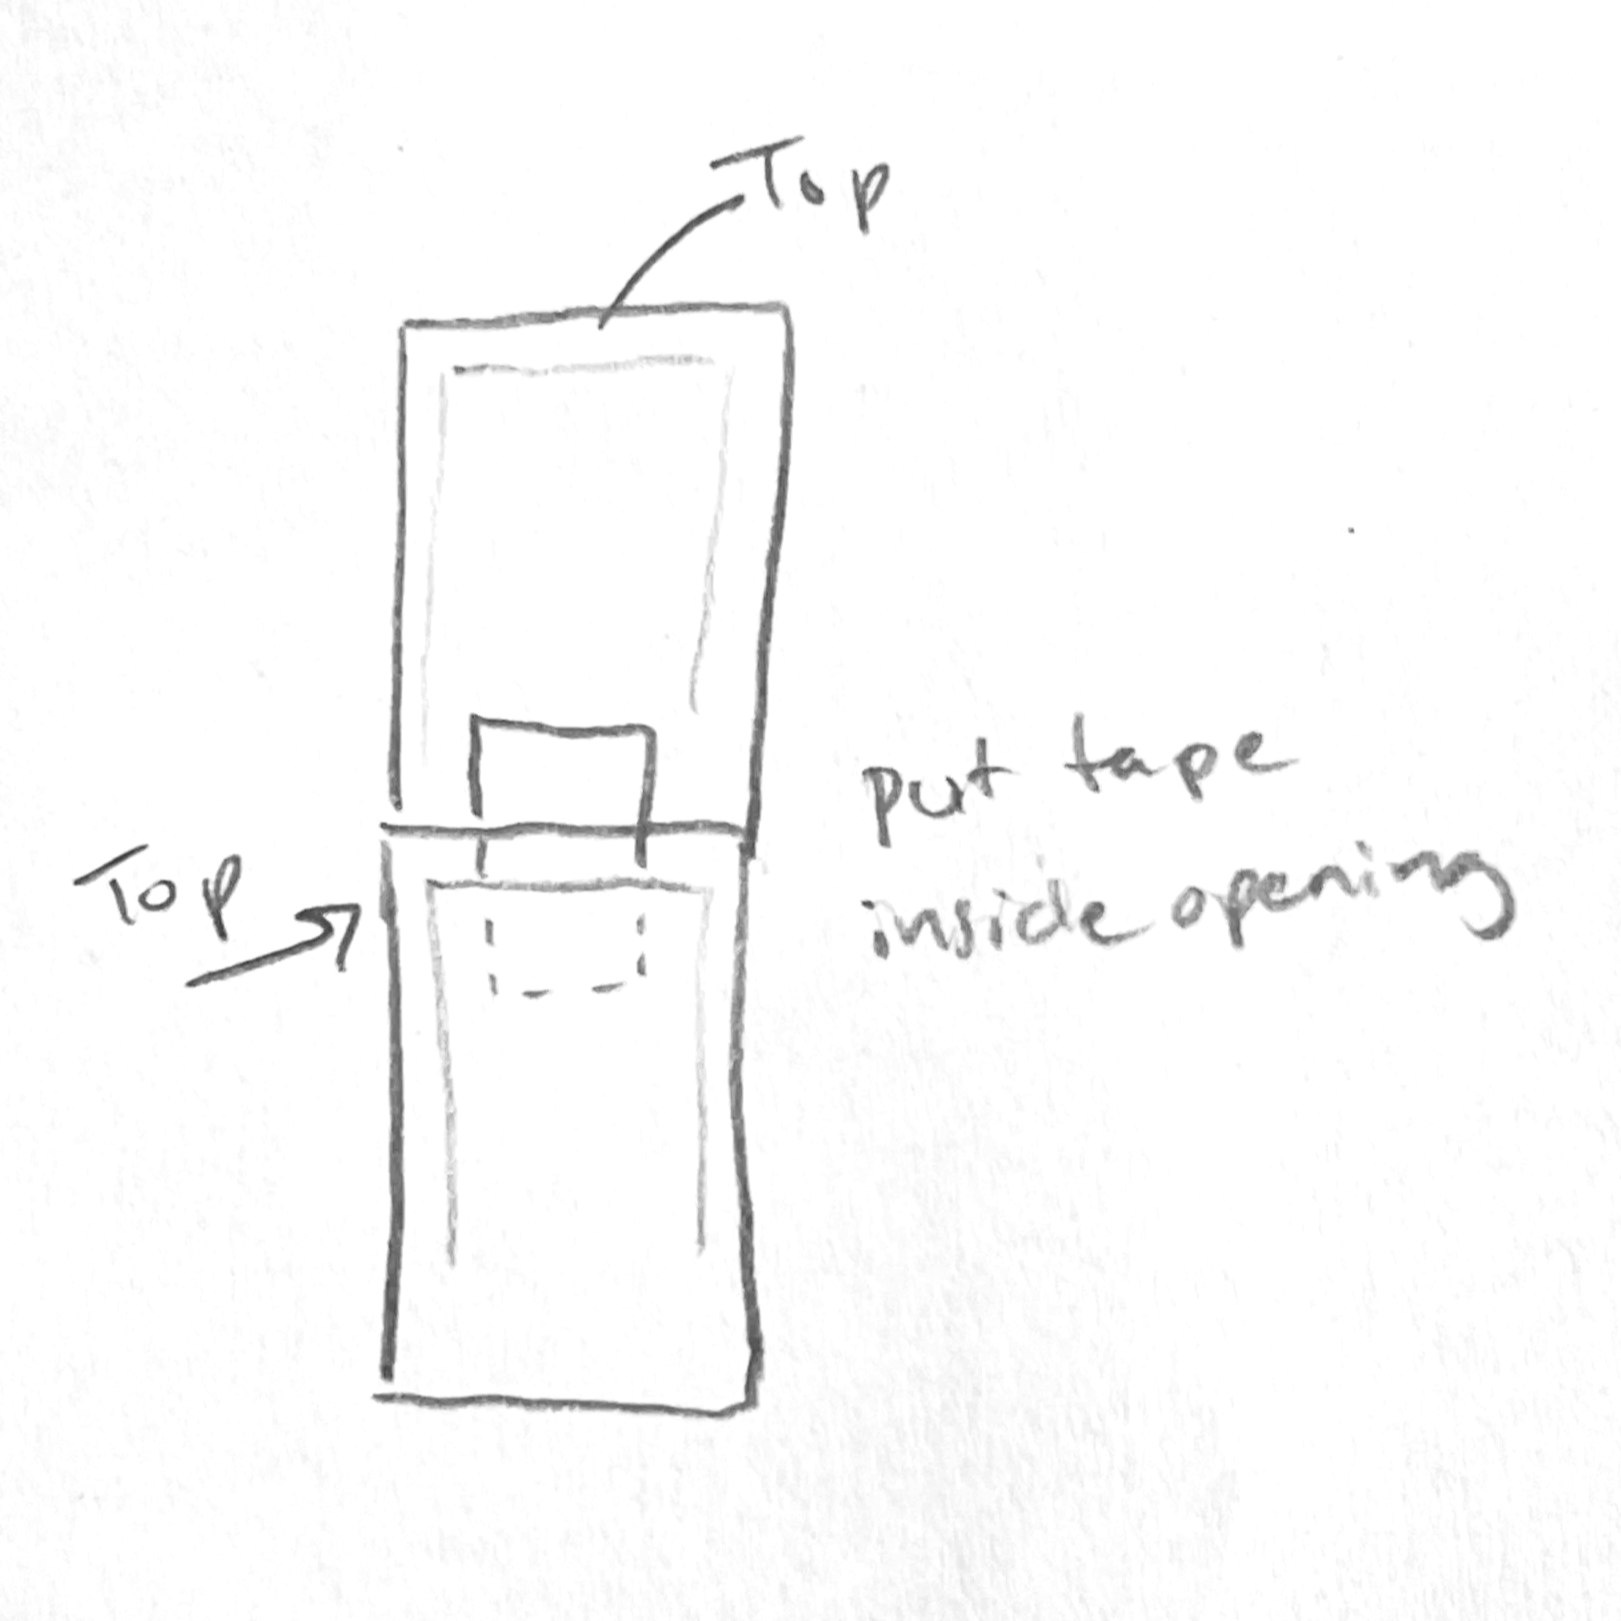
When taping a row to another row (like on the strap), put tape along the bottom of one row and underneath/inside the opening of the next so it can still open.
If you found this tutorial helpful and want to support me as an artist, please consider donating on Buy Me a Coffee. I appreciate your support immensely!