How to Make a Pin Swap

A finished Pin Swap
So you wanna make a Pin Swap? Here's how to make this one!
Safety reminder: Tie back long hair and protect your eyes and ears when using power tools! And protect your lungs if you’re not in a well-ventilated space.
SUPPLIES/CUT LIST
~3’ of 1x12 for the bottom, back, and door.
14” of 1x10 for the roof
~5’ of 1x6 for the sides and front (I’d get 6’ to be safe)
~20” of wooden dowel around 1” diameter
Plexiglass
Outdoor-rated paint
INSTRUCTIONS:
Start by cutting the bottom + the back and attach together. See figure 1 for measurements.
Note that the back is flat on the side that connects with the base/bottom but has a 15 degree angle cut at the top (see Figure 2). That’s so the roof will be slanted and rain will run off the back.
I always predrill holes so as not to split the wood.
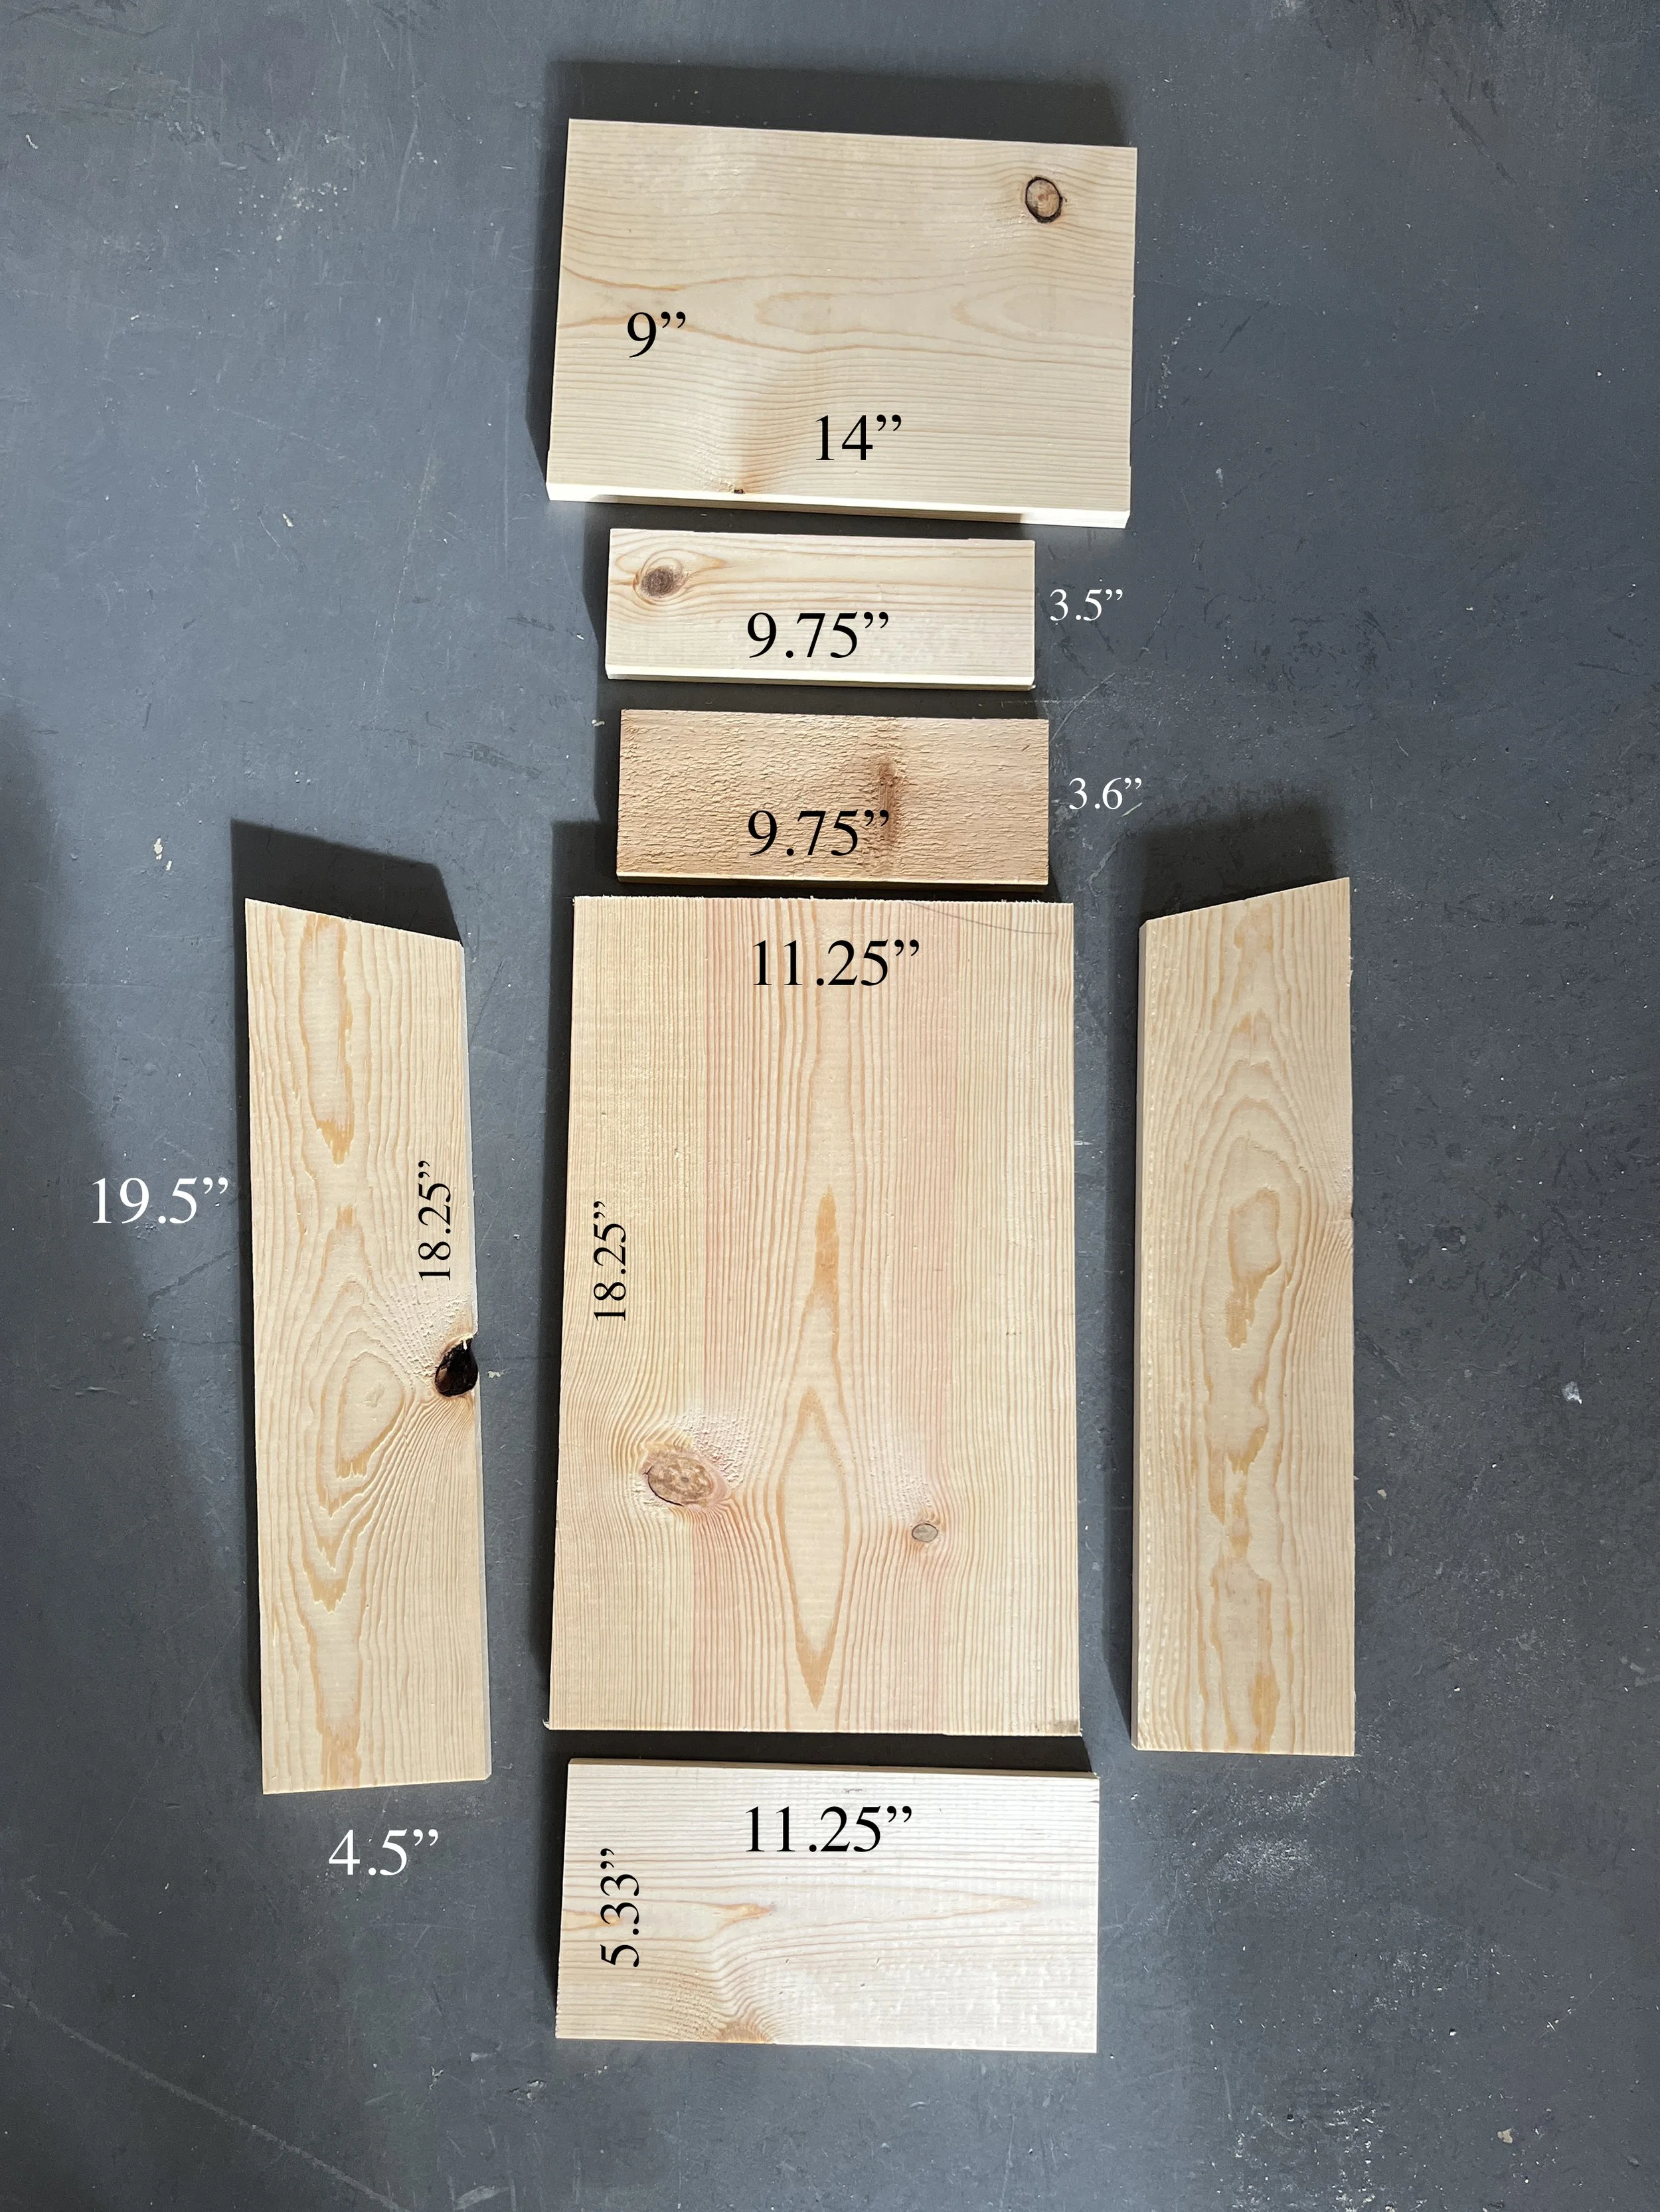
Figure 1: Measurements (not shown: dowel)

Figure 2: showing angle of back board
Once you have the back and bottom together, you can lay in your 1x6 piece that will become the sides and mark it so you’re cutting it just right to fit. It should ultimately be about 4.5” wide and 18.25” high (in the ‘back’ of the side, where it meets the back of the exchange) but adjust as needed.
Attach sides.
Line up your front piece with the top of your sides and attach (see figure 3 below)
Optional: Attach inner ceiling (see figure 3). I put this on the first few exchanges and later opted not to as it doesn’t add much.
Attach roof.

Caulk all the seams and let dry.
Finally do a few coats of outdoor-rated paint!
While it’s drying, you can create the felt interior. To make it long enough, I used two pieces of 9x12” felt (you’ll lose quite a few inches when it wraps around the dowel). To hide the seam between the two felt pieces, I placed another color of felt over top (see figure 4). I just used hot glue to connect them together. When you have a more-than-long enough piece, you can wrap it around the top dowel, then hold the dowel inside the display to see how far down you’ll want to place your lower dowel. Wrap felt around both dowels and glue, then screw the top dowel in place inside the display.
And there you have it! Your very own Pin Exchange! Let the trading begin.
I hope this plan is helpful and you’re able to create your own Pin Swap. If you have any questions, please let me know! And as always, if you have or make a joyful spot like this Pin Swap, I’d love to have you on the Worldwide Sidewalk Joy Map!